Academic Calendar
Set up category colours
This page describes the Categories tab of the Setup Data form.
ACal adds at least one category to every appointment it makes in order to make it easier to work with groups of appointments later.
The way Outlook adds colour to the categories is controlled by your master category list. You can edit this using Outlook’s All Categories form but ACal makes it much easier by enabling you to do it here. You can link each of the categories created by ACal to a colour on the two grids. Simply select a colour from the drop down list for each cell in the right hand column of each grid.
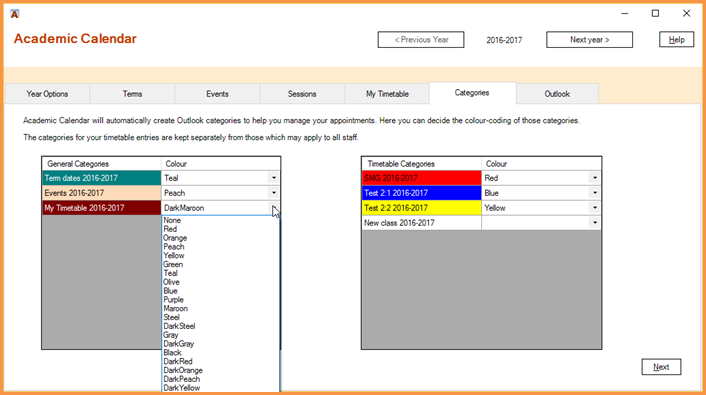
The grid on the left contains the categories that could apply to any staff. They will be included if you use the Send Data to a Colleague feature. In the image the user has just clicked the drop down to select a colour for the My Timetable category.
The grid on the right contains categories derived from our timetable and so are unique to you. They are stored with the timetable entries.
When you go to the Outlook tab and then create Outlook appointments ACal will assign these colours to the categories in the Master Category List.
NB: If you just want to change the category colours without making new appointments then choose your colours here then go to the Outlook tab and click the Create Appointments button. Because ACal checks that it will not be creating a duplicate before creating a new appointment no unnecessary appointments will be created but the colours in your Master Category List will be reset. However, they may not show up until you restart Outlook.