Academic Calendar
Updating your timetable(s) from the Setup Data screen
If you are just adding some new timetable commitments there is no need for any special procedure. Just add the new details in the My Timetable grid then go to the Outlook tab and create the appointments in the normal way. ACal will skip any appointments that have already been entered and just create the new ones. See Setting up my timetable
However, if you want to make updates that include changing the details of an existing timetable commitment or deleting one then follow the procedure outlined below.
Once you have used ACal to make timetable entries in Outlook a check box will be shown on the My Timetable(s) tab of the Setup Data screen – Show Update Actions. (When you first use this screen it is not shown as it is not yet relevant.) It is ready waiting for the time when you need to make mid-year timetable changes.
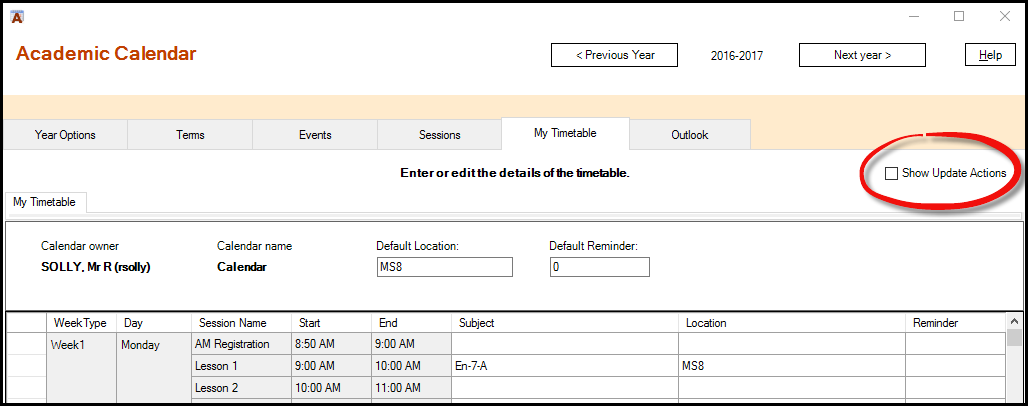
Click the Show Update Actions checkbox. This will display an extra column at the right of the timetable grid headed Update Actions. It has a drop down selector for each cell where you can indicate the action to be taken.
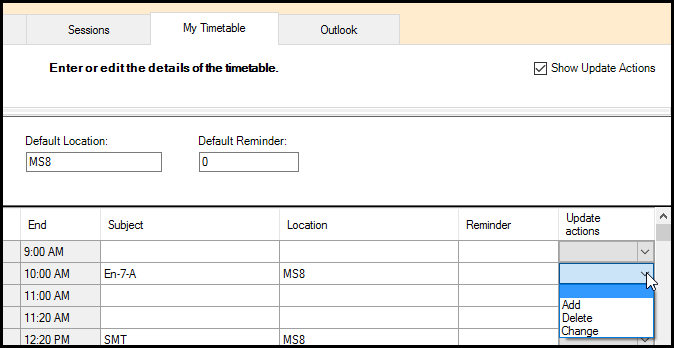
Now you can prepare any changes to the timetable entries by indicating the Update Action to be applied, as follows:
- If there are new timetable commitments in periods where you were previously free enter the details in the relevant columns and select Add as the action.
- If there are timetable commitments that you are released from and will be free for the period leave the details but select Delete as the action.
- If there are periods which will still be committed but the details change make the changes in the relevant cells and select Change as the action.
When you are ready to implement the changes click the Outlook tab. If you left the Update Actions column visible ACal assumes that you want to make the Outlook appointments to reflect the update changes and the button is now labelled Update timetable appointments. When you click the button a new form appears.
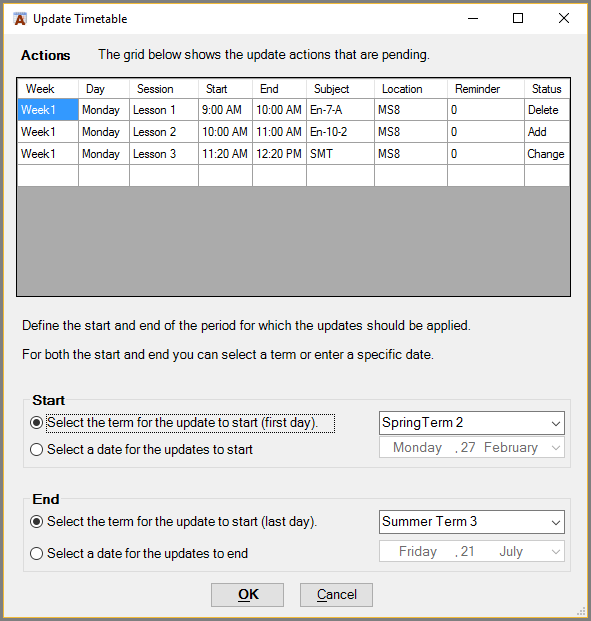
A grid in the upper portion of the form shows the update actions that will be performed. (If the grid is too narrow you can resize or maximize the form to get a better view.)
In the lower half of the form you must confirm or change the start and end dates between which the changes will be made. By default these will be the start of the next term and the end of the academic year. You can change them either by selecting a different term or by entering dates. When you select a term the date beneath it is automatically adjusted. If you change the Start term the date will be the first day of that term.; if you change the end term the date will be the last day of the term.
When you click OK. ACal will add, edit or delete the appointments as specified. A message box will pop up on completion. If you go back to the Setup Data form’s My timetable tab you will see that the Update Actions column has been hidden again and any items that were marked for deletion have been removed. If you want to make some more changes just click the checkbox to display it.