Academic Calendar
How to use categories and the By Category view
[wpi_designer_button text=’Video: How to use the By Categories view’ link=’http://www.academiccalendar.co.uk/acal-show-me-how-to-use-categories/’ style_id=’13396′ icon=’youtube’ target=’self’]
Most of the time you will view your calendar in Day, Week or Month View.
However, there are times when you want to work with a series of appointments that are not easy to get together on the normal calendar view.
Examples might be:
- Your timetable has changed and you want to delete a particular series of lessons.
- You want to look back over the lessons plans of a particular class
- You want to look at the records for a particular series of meetings
For all these Category View is what you need. It simply groups appointments that share the same category.
These can be categories that ACal created automatically when you created appointments from the setup wizard or ones you added manually.
In all versions of Outlook you can show or create a Category view but it can be complex so ACal makes it easy.
On the ribbon bar’s ACal tab a special section contains View buttons.

(The image is from Outlook 2013. Outlook 2010 is similar but with a different colour scheme. Outlook 2007 and 2003 have a toolbar rather than the ribbon. It includes a Views dropdown.)
Clicking on the By Category button will change the view to Category view.
When ACal creates appointments from the Setup screen it adds categories to each appointment automatically.
Every category is followed by a number indicating the start year of the academic year – 13 stands for 2013/14.
Under the Term Dates category you will find all the appointments that provide the headers giving you the details of each week.
Under the My Timetable category are all the appointments created from your Time table in the Setup wizard.
Each timetable appointment is also given a category based on the subject line of the appointment,
which might be a class code, the name of a regular meeting, and so on.
Category View Collapsed
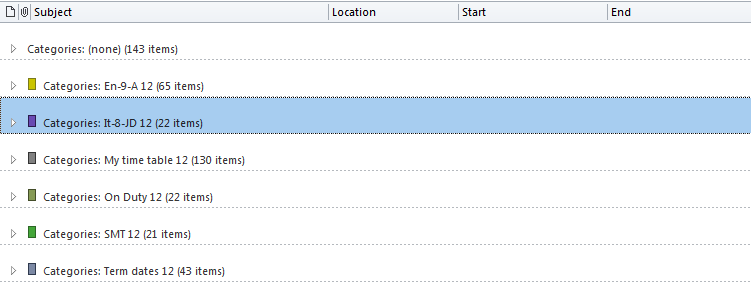
You can delete every appointment in a particular category by simply clicking to select that category so it changes colour.
(In the screenshot above the category It-8-JD) is selected. Then click the Delete button on the keyboard.
If you want to delete or edit some but not all of the appointments under the category heading you need to expand the collapsed list.
To do this simply click on icon to the left of the category’s coloured square. In Outlook 2013 the icon is a triangle while in earlier version it will be a plus sign.
Category View Expanded
In the screen shot below the category It-8-JD has been expanded.
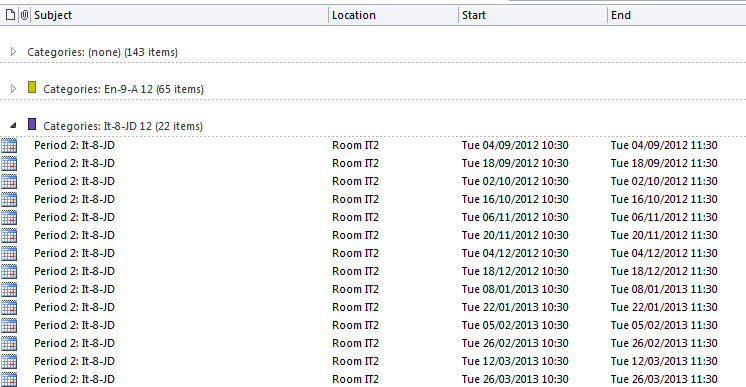
With the list expanded you can select single appointments or groups of appointments.
If you want to delete a series of lessons just click on the first one then hold the shift key down while you click on the last.
That should highlight all those selected. Then you can delete them.
If you make a mistake don’t worry. The appointments have not disappeared irrevocably, just been moved to the Delete Items folder
and they will stay there until such time as your Deleted Items folder is emptied. You can drag them back to the main calendar if you need to.
If you want to read or edit the information within the appointment just double click to open the first one. You can then use the up and down arrows to move between them.
The screen shot above shows the Next button at the top of the opened appointment.
The screenshot is from Outlook 2013 but in all other version the next and back buttons are in the same place although they have a different visual style.

To switch back to the normal calendar view simply click the Calendar view button to the left of the By Category button.