Deleting Appointments in Exchange
This page describes the Manage Many Calendars: Delete Appointments wizard.
Specifying what to delete
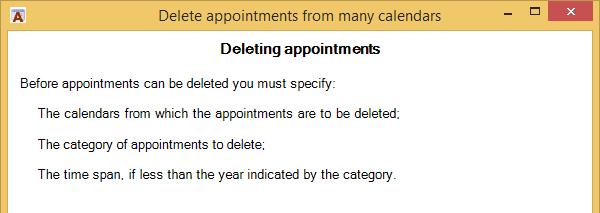
The image shows the introductory page that appears first if you select Delete Appointments from the Managing Multiple Calendars on the ribbon.
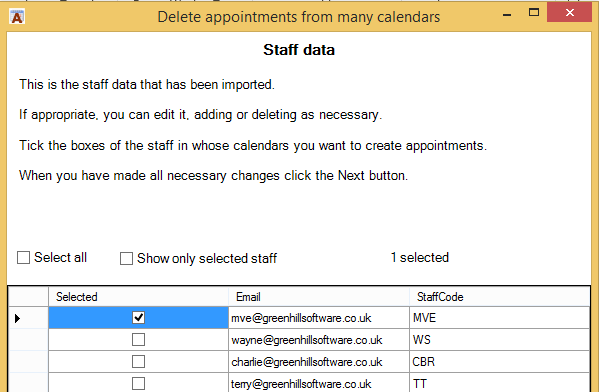
When you click Next the Import Staff routine begins just as in the Create Appointments Wizard. If staff details have already been loaded they will be shown. Make sure that the staff are selected from whose calendars you want to delete appointments.
Note that if you want to deleted timetable appointments using the sub categories that identify particular teaching groups you must only select one member of staff at a time, as the selection of categories is different for each one.
Next you are asked to login to Exchange. [wpi_designer_button text=’Read about connecting to Exchange’ link=’http://www.academiccalendar.co.uk/mmc-connect-to-exchange/’ style_id=’13396′ target=’self’]
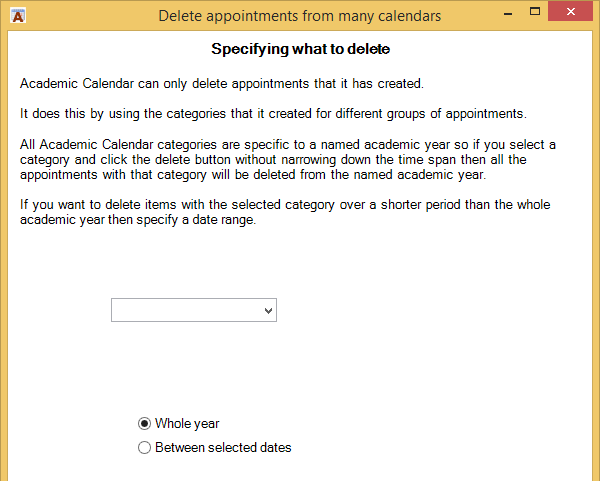
ACal uses the main categories it created when previously creating the appointments in Exchange to identify the appointments to delete.
You are asked to specify the categories of appointment you want to delete by selecting categories. The main categories that ACal creates are:
- Term dates + academic year
- Events + academic year
- My Timetable + academic year
Selecting a category, therefore will delete all appointments in that category during the named year for the calendars of the staff selected. The time span can be further restricted, if appropriate, by indicating a date range.
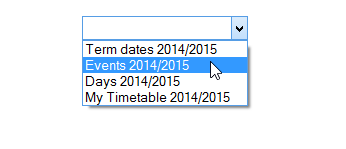
The image below shows the categories available from the drop down list.
The categories for Term Dates, Events and Days (which only appears if you have a Day-Count cycle rather than a weekly or two-week cycle) refer to the last academic year selected. If they are wrong go to the Setup Data form, select the academic year you want and then close the form.
The Timetable category comes from the last time the Manage Many Calendars wizard was used to create appointments.
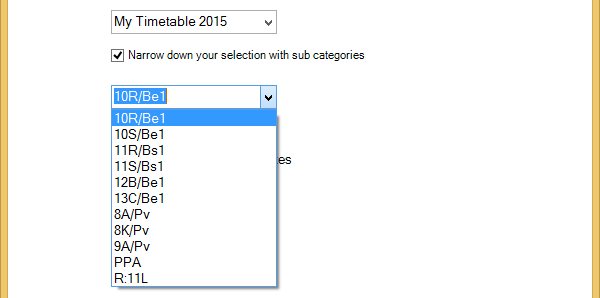
If you choose either Events or My timetable then extra items appear to enable you to narrow down the selection of appointments to be deleted by the use of sub-categories.
If you leave the tick box un-ticked then all the appointments with the Events 2015 category will be deleted. If you tick the tick-box then the drop down will be enabled and filled with any extra categories you used when entering events for the year in question.
In the example below the My Timetable category was chosen and the drop-down lists the classes on the timetable. Note that the timetable sub-categories are only available if you have selected only one member of staff. This is because the list of classes is particular to each member of staff.
When you click the Next button the deletions you have specified will take place. Scroll up and click the second tab for details on the feedback while this happens.
Feedback
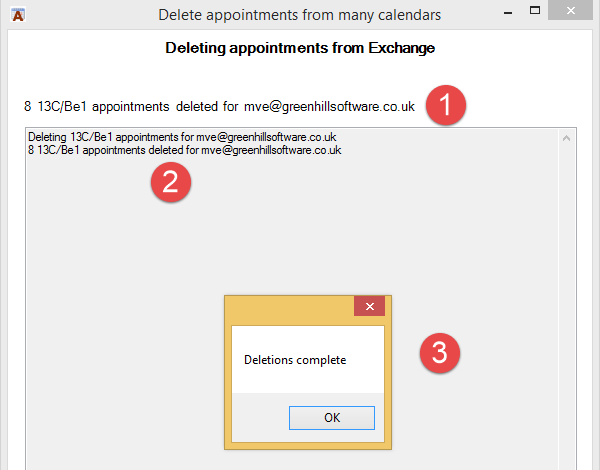
- The top line of the feedback page gives you a running commentary on what is happening. In this example the user selected to delete all appointments with a category of 13C/Be1. Eight appointments were found matching this category and each one was deleted. The single line feedback shows each of these actions.
- The main body of the feedback page shows a cumulative description of what has happened. In this case there is only one line but if we had been deleting Events for all staff there would be a line for each member of staff.
- When all the delete operations are complete a message pops up to let you know.
When the deletions are complete the Next Button changes to read Exit. However, you may want to click the Back button which will take you back to the start of the wizard so you can change your selection of staff and or categories. The connection with Exchange will remain open so you will not need to log in again.
